



Building a reliable villager breeder in Minecraft helps you expand your village, populate trading halls, and prepare villagers for other survival projects. However, a working breeder needs more than two villagers and a few beds. You must understand food requirements, bed availability, villager movement, and how to separate newborns from the breeding area. In this guide, GameORB explains how to build a basic Minecraft villager breeder, upgrade it with automatic food and baby collection systems, and troubleshoot common issues in Java and Bedrock Edition.
What Is A Villager Breeder In Minecraft?
A villager breeder is a dedicated setup that creates suitable conditions for villagers to reproduce. Unlike a naturally generated village, a purpose-built breeder gives you more control over food, beds, villager movement, and population growth.
There are two common approaches:
- Manual breeder: A simple enclosure where you provide food and manage the beds yourself. It is suitable for producing a small number of villagers.
- Automatic breeder: A setup that uses a farmer, crops, or a separate collection area to reduce manual work. Depending on the design, it can also move baby villagers away from the breeding pair.
A breeder does not create villagers instantly or guarantee continuous production. Villagers must become willing to breed, and the game must recognize suitable bed capacity. The exact mechanics also vary between Java Edition and Bedrock Edition.
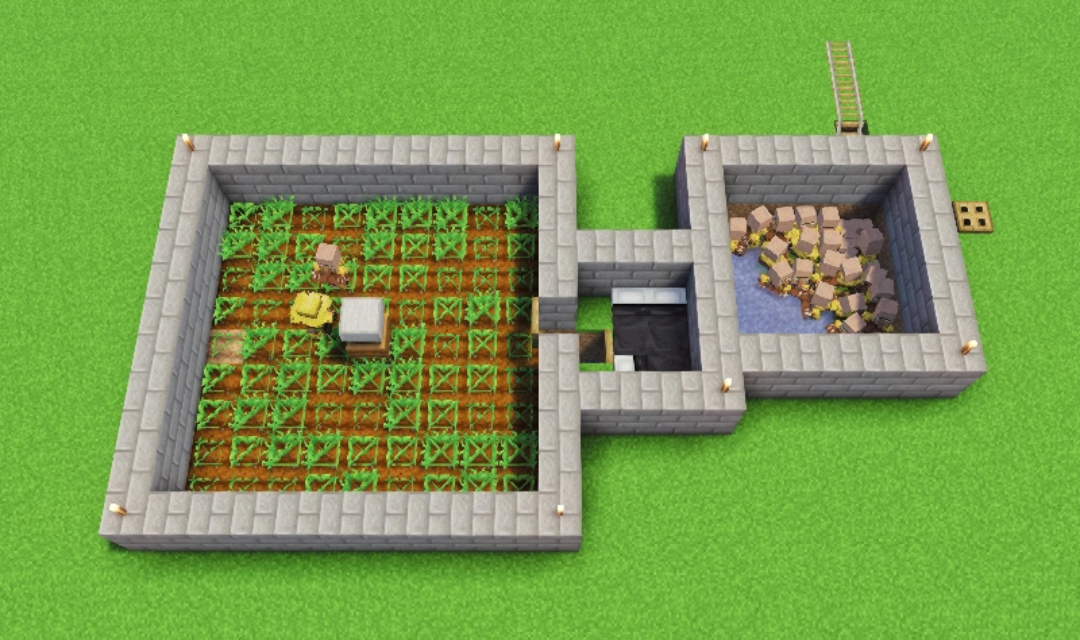
What You Need To Build A Minecraft Villager Breeder
Before building, prepare the essential materials and choose a location where villagers can move safely.
Essential Materials
For a basic two-villager breeder, gather:
- 2 adult villagers: The initial breeding pair.
- At least 3 beds: Two for the adults and one available for a baby. Additional beds may be needed as the population grows.
- Food: Bread, carrots, potatoes, or beetroot.
- Building blocks and fences: To create a secure enclosure and control movement.
- Lighting: To help protect the surrounding area from hostile mobs.
- Transport materials: Boats or minecarts for moving villagers into the breeder.
- Optional farming materials: Farmland, water, crops, and a composter if you want a farmer to help supply food.
You do not need redstone, a bell, or a workstation for basic villager breeding. A composter is useful when creating a farmer-based food supply, but it is not a universal breeding requirement.
Choose A Safe Location
Build the breeder on relatively flat ground with enough room for beds, movement, and a collection area. Keeping it separate from your main village can make it easier to manage villagers and identify problems with bed detection.
Important: Place your breeder at least 80 blocks away from any existing village. If it’s too close, villagers from the nearby village may claim the beds in your breeder, preventing your breeding pair from producing babies.
Before construction, check for nearby beds, villagers, and village structures. These can affect breeding mechanics differently in Java and Bedrock Edition, so avoid assuming that a design will work identically in both versions.
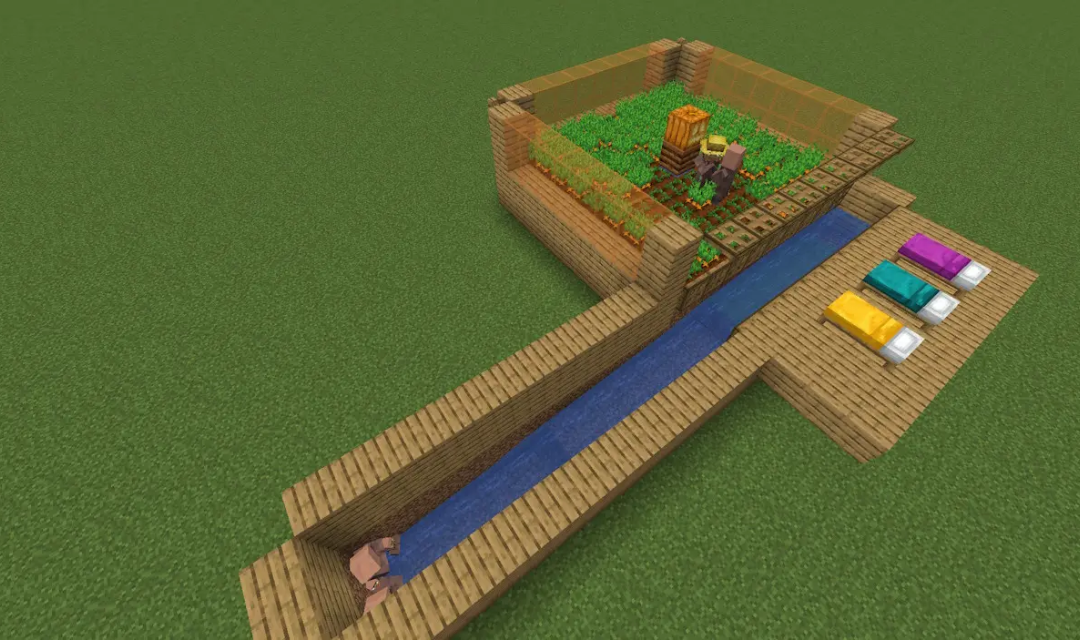
How To Build A Villager Breeder Step By Step
Start with a simple enclosure and test the breeding process before adding optional automation. The following layout is a practical starting point for a basic breeder.
Step 1: Build A Secure Enclosure
Build a 5×5 or 7×7-block enclosure with walls at least 2 blocks high. Add a 1-block-wide entrance with a fence gate to control access, and keep the interior clear enough for two adult villagers to move and interact. Protect the area from zombies and other hostile mobs.
Step 2: Transport Two Adult Villagers
Use boats or minecarts to bring two adult villagers into the enclosure. Close the entrance and check that both villagers can move freely. Use a safe route to avoid hostile mobs and dangerous terrain during transport.
Step 3: Place Beds Correctly
Start with at least three beds: two for the adults and one available for a baby. Leave 2 blocks of clear space above each bed and arrange the beds with enough room for access. Spacing beds about 2 blocks apart helps with access. Add more beds if you plan to expand the breeder.
Step 4: Provide Enough Food
Each villager needs at least 12 food points to become willing to breed. Give each villager one of these options:
| Food | Per villager | For two villagers |
| Bread | 3 | 6 |
| Carrots | 12 | 24 |
| Potatoes | 12 | 24 |
| Beetroot | 12 | 24 |
Bread provides 4 food points per item; each listed crop provides 1. Throw the food near the villagers and allow them to collect it.
Note: Feeding is the most common way to make villagers willing, but you can also make them willing by trading with them. A successful trade gives a small amount of willingness, which can be useful if you are short on food.
Step 5: Test The Breeding Process
Wait for the villagers to interact. Hearts indicate a breeding attempt, but a baby may not appear if no suitable bed is available. If the attempt fails, check bed availability, headroom, and access before changing the design.
Optional: Baby Collection System
To make the breeder easier to manage, add a separate area for newborn villagers and a safe route to move them toward a trading hall. The collection mechanism depends on the design and game edition, so test it before leaving the system running. Keep the route clear of hostile mobs, dangerous drops, and other hazards.
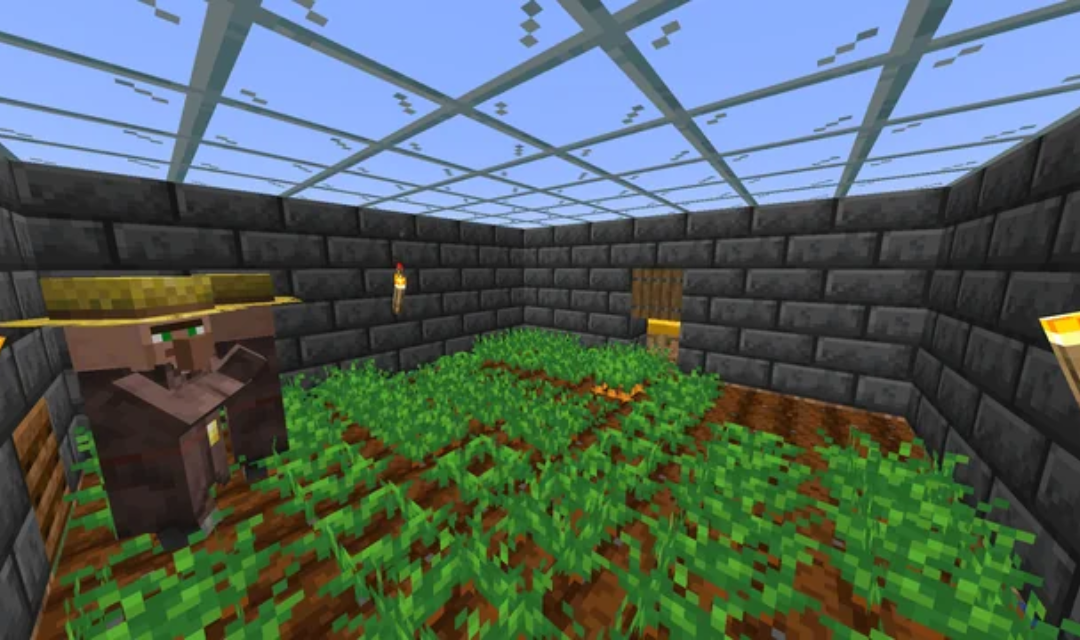
How Automatic Villager Breeders Work
An automatic breeder reduces the amount of food and villager management you need to do manually. However, “automatic” does not mean every part of the process works without setup or maintenance.
Use A Farmer To Supply Food
A farmer villager can harvest crops and share excess food with nearby villagers. To create this system, add farmland, a water source, suitable crops, and a composter so an unemployed villager can take the farmer profession.
Give the farmer access to the crops and make sure the breeding villagers can receive food. A farmer-based system may take time to produce enough food, and its operation depends on villager behavior and game settings.
A composter does not make villagers breed by itself. It provides a job site for the farmer, while the food supply helps the breeding pair become willing.
Separate Babies From The Breeding Area
A collection system helps move baby villagers away from the adults once they are born. This can make the breeder easier to manage and help prevent the collection area from becoming overcrowded.
Design the route for the edition you play. Do not assume that a trapdoor, gap, or pathfinding trick used in one tutorial will behave the same way in every version.
Understand Capacity And Performance
Every villager adds to the number of entities the game must process. A large breeder with many villagers, complicated movement routes, and additional farms can increase local performance demands, especially on weaker devices or busy multiplayer servers.
Keep only the number of villagers you need, move newborns to their intended destination, and avoid unnecessarily complicated mechanisms. Villagers are not a reason to assume a specific hostile-mob cap has been reached; performance issues and mob-cap limits are different concerns.
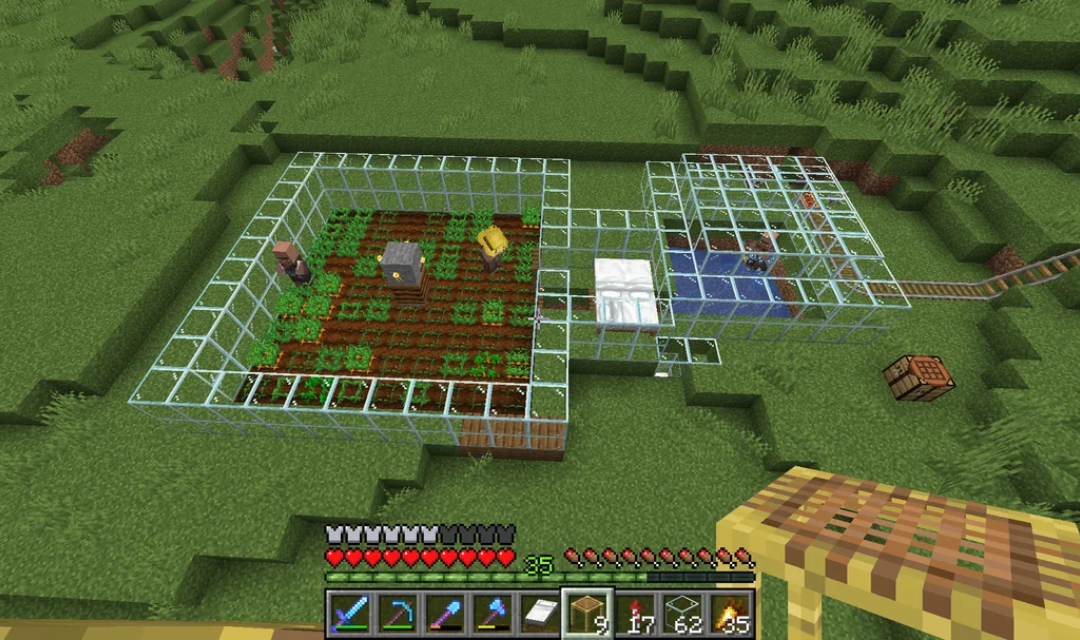
How To Breed Villagers In Minecraft
You do not need an automatic breeder to produce villagers. The same basic process works in a suitable village or secure room, provided the requirements for your edition are met.
How To Breed Villagers Without A Dedicated Breeder
Follow these steps:
- Find two adult villagers: Keep them in a safe area where they can interact.
- Provide suitable beds: Make sure the game recognizes enough valid bed capacity for the adults and the baby.
- Give each villager enough food: Supply 3 bread, 12 carrots, 12 potatoes, or 12 beetroot per villager.
- Wait for an attempt: Allow the villagers to collect food and interact. Hearts indicate a breeding attempt.
- Check the outcome: If no baby appears, inspect bed availability, headroom, and the relevant edition’s village mechanics.
This approach is best for producing a few villagers. A dedicated breeder is more convenient when you need a steady supply for a trading hall or another large project.
Java Edition vs. Bedrock Edition
The food requirements are similar in both editions, but their village and bed mechanics are not identical.
| Feature | Java Edition | Bedrock Edition |
| Food | Each villager needs enough food to become willing | The same basic food options and amounts apply |
| Bed requirement | A breeding attempt must find a suitable unclaimed bed that the birthing parent can reach | Breeding depends on valid beds and the village’s population capacity |
| Village mechanics | Villages are not managed through the same fixed population-cap system used in Bedrock | Village boundaries, bed links, and population limits influence breeding |
| Design compatibility | Some designs rely on Java-specific pathfinding and village behavior | Some designs need different bed placement or collection mechanics |
Important: Use a Villager Breeder tutorial made for your edition and game version. If a design fails, do not assume the food requirements are wrong; the issue may be how the game detects beds, villagers, or village boundaries. This guide is based on Minecraft 1.14+ mechanics, where beds replaced doors as the primary requirement for a functional Villager Breeder. Older tutorials relying on doors will not work in modern versions of the game.
Common Villager Breeder Problems And How To Fix Them
Most breeder problems involve food, bed availability, villager movement, or the design’s collection system. Check these conditions before rebuilding the entire structure.
Villagers Show Hearts But No Baby Appears
Hearts indicate a breeding attempt, not a guaranteed successful birth. The attempt may fail if the game cannot find a suitable available bed.
Add another bed, leave two clear blocks above it, and check whether the bed is already claimed or accessible. In Bedrock Edition, also consider whether the village’s valid bed capacity is limiting population growth.
Villagers Do Not Show Hearts
Both villagers must be adults and have enough food to become willing. Give each one 3 bread or 12 of a suitable crop, then allow time for them to collect it.
If they still do not attempt to breed, check whether they can move and interact freely within your Villager Breeder. If villagers cannot pick up food, check the world settings, including whether mobGriefing is disabled.
The Breeder Stops Working After Producing Several Villagers
The Villager Breeder may have reached its available bed capacity, or the design may not be moving newborns as intended. Add suitable beds and confirm that the game recognizes them.
If the breeder includes a farmer or collection system, check each component separately. Make one adjustment at a time so you can identify the actual cause instead of changing the entire build.
Villagers Escape Or Are Attacked
Inspect the enclosure, entrances, and collection route of your Villager Breeder for gaps or unsafe drops. Seal openings and protect villagers from zombies and other hostile mobs.
Keep the area well-lit and away from lava or other hazards. If villagers are being moved automatically, test the route with care before leaving the system running.
Conclusion
A reliable villager breeder starts with two adult villagers, enough food, and suitable beds, but an efficient design also needs safe movement and clear bed access. For a more automated setup, add a farmer-based food supply and a collection area suited to your edition. Test the basic breeding process first, then expand the system as your needs grow. Explore more Minecraft guides on GameORB for practical building tips and survival strategies.